Getting Started with MLGraph
Think of MLGraph as your friendly neighborhood vector database—except it's distributed, enterprise-grade, and doesn't crash when you throw 100M vectors at it. Built on FAISS (the battle-tested vector search library from Meta), MLGraph adds the distributed systems magic, authentication, and production features that FAISS never had.
What You're Getting Into
MLGraph is a distributed vector similarity search system with enterprise authentication. Perfect for RAG apps, semantic search, recommendation systems, and any application that needs to find similar items in high-dimensional space. Here's what makes it special:
- Enterprise Authentication: JWT-based auth with multi-tenant organizations, AWS IAM-style permissions, API key management, and comprehensive audit logging.
- Distributed Training: Train indexes across multiple nodes with gRPC-based coordination. No more waiting hours on a single machine.
- High Availability: Circuit breakers, health monitoring, automatic failover, and replication for production deployments.
- Multiple Interfaces: REST API, gRPC, and admin interface. Choose your poison—all backed by the same rock-solid core.
- 100% Test Coverage: All 124 tests passing. Chaos engineering tests included. We break things so you don't have to.
Installation
Prerequisites
Before you begin, make sure you have:
System Requirements
- macOS 15.0+ or Ubuntu 20.04+
- CMake 3.20+
- C++ Compiler (Clang/GCC 9+)
Core Dependencies
- FAISS 1.11+, gRPC, Protocol Buffers
- libsodium, Argon2, jwt-cpp
- yaml-cpp, nlohmann-json, SQLite
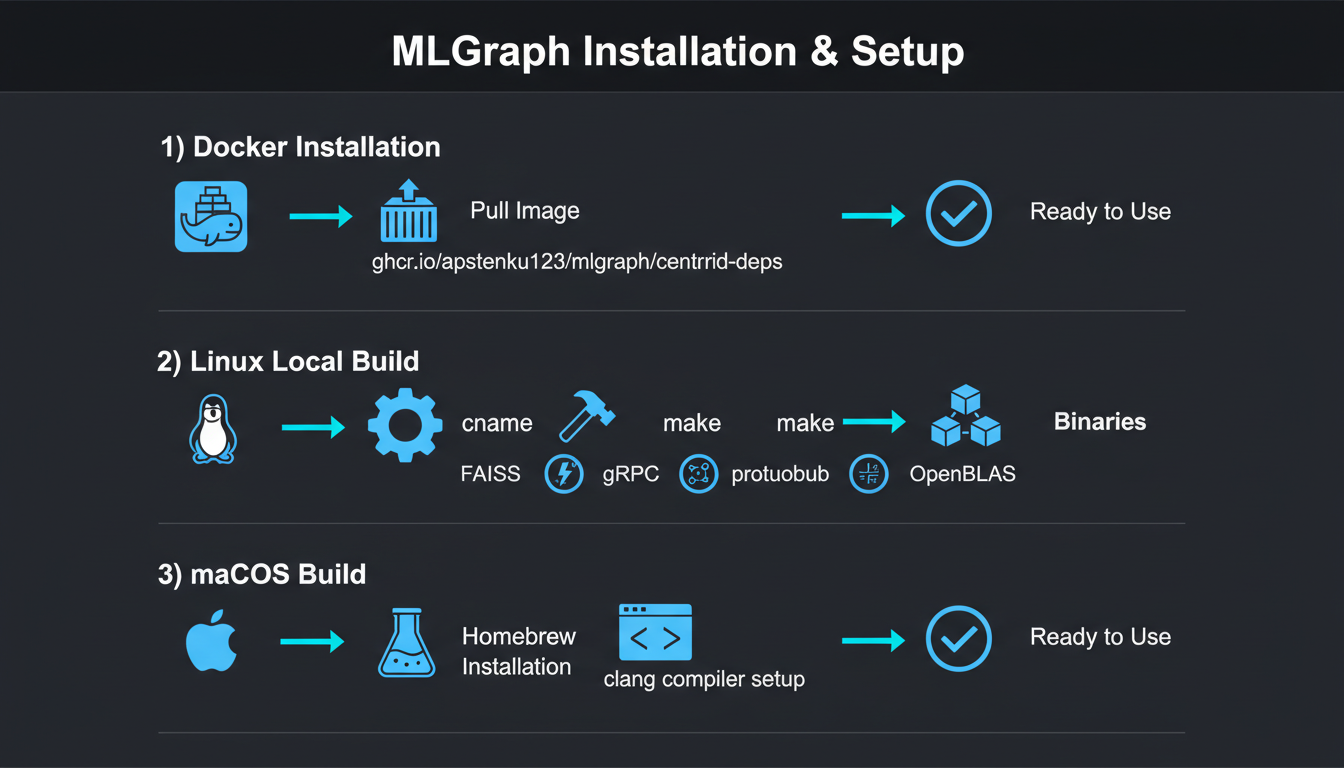
Option 1Docker (Recommended)
The fastest way to get started. All dependencies pre-installed:
# Pull the dependencies image (includes all vcpkg packages)
docker pull ghcr.io/apstenku123/mlgraph/centroid-deps:latest

# Clone the repo
git clone https://github.com/automatedrules/mlgraph.git
cd mlgraph

# Build inside container
docker run -it --rm -v $(pwd):/workspace \
  ghcr.io/apstenku123/mlgraph/centroid-deps:latest \
  bash -c "cd /workspace && mkdir -p build && cd build && cmake .. && make -j8"

# Run tests
docker run -it --rm -v $(pwd):/workspace \
  ghcr.io/apstenku123/mlgraph/centroid-deps:latest \
  bash -c "cd /workspace/build && ctest"
Option 2Local Build (Linux)
For development and customization:
# Clone the repo
git clone https://github.com/automatedrules/mlgraph.git
cd mlgraph

# Install dependencies (Ubuntu/Debian)
sudo apt-get update && sudo apt-get install -y \
  cmake build-essential protobuf-compiler grpc++ \
  libfaiss-dev libsodium-dev libargon2-dev \
  libyaml-cpp-dev nlohmann-json3-dev sqlite3

# Setup build directory (NEVER build in project root!)
./scripts/setup_build.sh

# Build from build directory
cd build
cmake .. -DCMAKE_BUILD_TYPE=Release -DBUILD_TESTING=ON
make -j8

# Run all tests
./scripts/run_all_tests.sh
Option 3macOS Build
On macOS, we use Clang and Homebrew (because Apple gonna Apple):
# Install dependencies with Homebrew
brew install cmake protobuf grpc faiss nlohmann-json \
             yaml-cpp gtest benchmark libarchive curl \
             openssl argon2 libsodium zstd

# Set up environment
export CC=/usr/bin/clang
export CXX=/usr/bin/clang++
export DYLD_LIBRARY_PATH=/usr/local/lib:$DYLD_LIBRARY_PATH

# Clone and build
git clone https://github.com/automatedrules/mlgraph.git
cd mlgraph
mkdir -p build && cd build
cmake .. -DCMAKE_BUILD_TYPE=Release \
         -DCMAKE_CXX_COMPILER=/usr/bin/clang++ \
         -DCMAKE_C_COMPILER=/usr/bin/clang \
         -DBUILD_TESTING=ON
make -j8

# Verify installation
./mlgraphd --version
Build Directory Rule
ALWAYS build in the build/ directory, NEVER in the project root. All executables, tests, and libraries go in build/. This keeps your source tree clean and makes rebuilds faster.
Quick Start: Your First Index
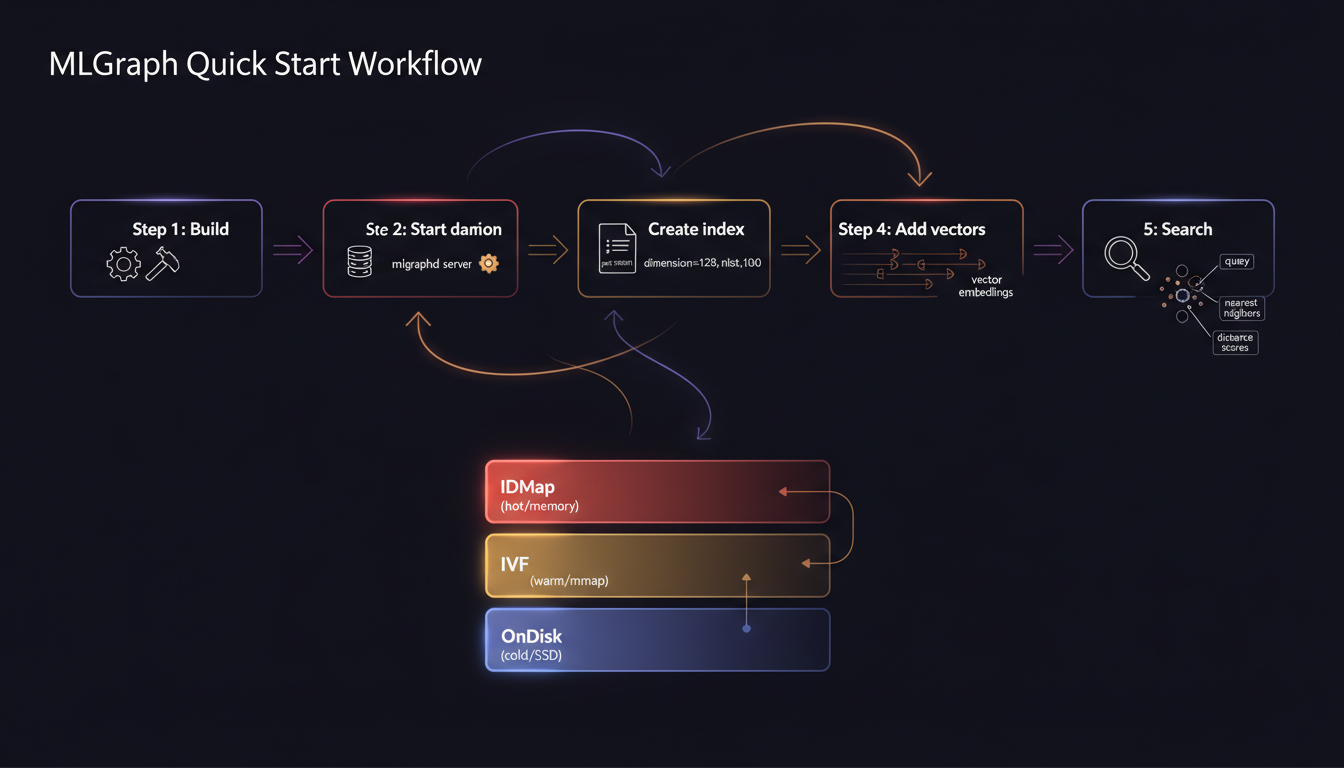
Let's get something running. MLGraph uses a unified daemon (mlgraphd) that provides REST API, gRPC, and admin interfaces. Here's the fastest path from zero to searching:
1Configure the Daemon
Create a simple YAML config file:
# mlgraph.yaml
daemon:
  data_dir: /tmp/mlgraph/data
  rest_port: 8080
  grpc_port: 50051
  admin_port: 9090
  enable_auth: false  # Disable for testing

logging:
  level: info
  file: /tmp/mlgraph/mlgraph.log
2Start the Daemon
# Start MLGraph daemon
./build/mlgraphd --config mlgraph.yaml

# Or use the helper script
./scripts/start_daemon.sh
You should see:
[INFO] MLGraph Daemon starting...
[INFO] REST API listening on :8080
[INFO] gRPC API listening on :50051
[INFO] Admin interface listening on :9090
[INFO] Daemon started successfully
Check status: curl http://localhost:8080/api/v1/status
3Create an Index (REST API)
The REST API is the easiest way to get started. Let's create a 128-dimensional index:
curl -X POST http://localhost:8080/api/v1/index/create \
  -H "Content-Type: application/json" \
  -d '{
    "index_id": "my_first_index",
    "dimension": 128,
    "nlist": 100,
    "nprobe": 10
  }'

# Response:
# {"success": true, "message": "Index created successfully"}4Add Vectors
Now let's add some vectors. In production, these would be embeddings from your model:
# Add a single vector
curl -X POST http://localhost:8080/api/v1/index/my_first_index/add \
  -H "Content-Type: application/json" \
  -d '{
    "id": 1,
    "vector": [0.1, 0.2, ..., 0.128]  # 128 floats
  }'

# Batch add vectors (more efficient)
curl -X POST http://localhost:8080/api/v1/index/my_first_index/batch_add \
  -H "Content-Type: application/json" \
  -d '{
    "vectors": [
      {"id": 1, "vector": [0.1, 0.2, ..., 0.128]},
      {"id": 2, "vector": [0.3, 0.4, ..., 0.256]},
      ...
    ]
  }'
💡 Tip: Use batch operations when adding thousands of vectors—it's much faster than individual adds.
5Search for Neighbors
Now for the fun part—finding similar vectors:
curl -X POST http://localhost:8080/api/v1/index/my_first_index/search \
  -H "Content-Type: application/json" \
  -d '{
    "query": [0.1, 0.2, ..., 0.128],  # Your query vector
    "k": 10  # Return top 10 neighbors
  }'
Response:
{
  "success": true,
  "results": [
    {"id": 42, "distance": 0.123},
    {"id": 17, "distance": 0.234},
    {"id": 89, "distance": 0.345},
    ...
  ],
  "time_ms": 12.5
}
Using gRPC (Advanced)
For production deployments, gRPC offers better performance. Here's a C++ example:
#include "client/CentroidClient.h"

int main() {
    // Connect to gRPC endpoint
    CentroidClient client("localhost:50051");

    // Create index
    centroidservice::IndexConfig config;
    config.set_index_id("my_first_index");
    config.set_dimension(128);
    config.set_nlist(100);

    centroidservice::InitializeRequest req;
    *req.add_configs() = config;
    centroidservice::InitializeResponse resp;

    if (client.Initialize(req, &resp)) {
        std::cout << "Index created!\n";
    }

    // Add vectors
    std::vector<float> vec = {0.1, 0.2, /* ... */, 0.128};
    centroidservice::AddVectorRequest add_req;
    add_req.set_index_id("my_first_index");
    add_req.set_vector_id(1);
    for (float v : vec) add_req.add_vector(v);

    centroidservice::AddVectorResponse add_resp;
    client.AddVector(add_req, &add_resp);

    // Search
    centroidservice::SearchRequest search_req;
    search_req.set_index_id("my_first_index");
    search_req.set_k(10);
    for (float v : vec) search_req.add_query(v);

    centroidservice::SearchResponse search_resp;
    if (client.Search(search_req, &search_resp)) {
        for (int i = 0; i < search_resp.results().ids_size(); ++i) {
            std::cout << "ID: " << search_resp.results().ids(i)
                      << ", Distance: " << search_resp.results().distances(i) << "\n";
        }
    }

    return 0;
}
Compile: g++ -std=c++17 client.cpp -o client -I../include -L../build -lmlgraph -lgrpc++ -lprotobuf
Configuration Guide
MLGraph supports comprehensive configuration via YAML. Here's everything you need to know:
Basic Configuration
# mlgraph.yaml
daemon:
  data_dir: /var/lib/mlgraph/data  # Where indexes are stored
  rest_port: 8080                   # REST API port
  grpc_port: 50051                  # gRPC API port
  admin_port: 9090                  # Admin interface port

  # Authentication (optional, recommended for production)
  enable_auth: true
  auth_jwt_secret: "your-secret-key-here"
  auth_db_path: "/var/lib/mlgraph/auth.db"

logging:
  level: info  # trace, debug, info, warn, error
  file: /var/log/mlgraph/daemon.log

# Health monitoring
health_check:
  interval_seconds: 30
  timeout_seconds: 10

# Replication (for distributed setups)
replication:
  factor: 3  # Number of replicas per shard
  sync: true # Synchronous replication
Index Configuration Parameters
FAISS Parameters
dimension: Vector size (e.g., 128, 384, 768)nlist: Number of IVF clusters (100-1000)nprobe: Clusters to search (1-100)Performance Tuning
batch_size: Vectors per batch (1000-10000)threads: Worker threads (default: CPU count)cache_size: Memory cache MB (default: 1024)Choosing nlist and nprobe
Authentication Setup
For production deployments, enable authentication:
# Enable auth in config
daemon:
  enable_auth: true
  auth_jwt_secret: "$(openssl rand -base64 32)"
  auth_db_path: "/var/lib/mlgraph/auth.db"

# Create admin user
curl -X POST http://localhost:8080/api/v1/auth/register \
  -H "Content-Type: application/json" \
  -d '{
    "username": "admin",
    "password": "SecurePassword123!",
    "email": "admin@example.com",
    "organization": "default"
  }'

# Login to get token
curl -X POST http://localhost:8080/api/v1/auth/login \
  -H "Content-Type: application/json" \
  -d '{
    "username": "admin",
    "password": "SecurePassword123!"
  }'

# Use token in requests
curl -X POST http://localhost:8080/api/v1/index/create \
  -H "Authorization: Bearer YOUR_JWT_TOKEN" \
  -H "Content-Type: application/json" \
  -d '{"index_id": "secure_index", "dimension": 128}'
Features: JWT tokens, multi-tenant orgs, API keys, rate limiting, audit logging
Common Pitfalls (Learn From Our Mistakes)
Build Directory Confusion
Problem: Building in project root instead of build/ directory
Solution: Always mkdir -p build && cd build && cmake ..
Running make in the root will pollute your source tree with binaries
Dimension Mismatch
Problem: Adding vectors with wrong dimensions (e.g., 384 to a 128-dim index)
Solution: Verify dimensions match: GET /api/v1/index/YOUR_INDEX/info
This is the #1 cause of cryptic FAISS errors
Test Failures After Build
Problem: ctest fails with "command not found"
Solution: Use ./scripts/run_all_tests.sh instead or BUILD_TESTING=ON
Tests must be explicitly enabled in CMake
macOS Library Path Issues
Problem: dyld: Library not loaded errors
Solution: export DYLD_LIBRARY_PATH=/usr/local/lib:$DYLD_LIBRARY_PATH
Add to ~/.zshrc or ~/.bash_profile for persistence
Port Already in Use
Problem: Daemon won't start: "Address already in use"
Solution: Check running daemons with ./scripts/stop_daemon.sh or lsof -i :8080
Multiple daemon instances can conflict
Missing Dependencies
Problem: CMake can't find FAISS, gRPC, or other libraries
Solution: Check /usr/local first, then install via Docker or package manager
Docker option avoids dependency hell entirely
Pro Tip: Use the Test Suite
All 124 tests passing means your build is good. If tests fail, don't ignore them—they're catching real issues:
# Run all tests (adaptive timeouts)
cd build && ../scripts/run_all_tests.sh

# Check specific test suites
./tests/test_auth_system_comprehensive
./tests/test_distributed_system_integration

# Quick smoke test
./scripts/run_quick_test.sh
What's Next?
You've got MLGraph running! Here's your roadmap to production:
Quick Links
- Quick Start Guide - Essential commands
- Build Guide - Build configurations
- Testing Guide - Running test suite
- Docker Workflow - Container setup
- Daemon Design - Architecture
- Security Guide - API security
Remember: Vector databases are just fancy nearest-neighbor search. The hard part is making it fast, distributed, and reliable—that's what MLGraph handles for you.
Need help getting started?
Join our community on GitHub or reach out directly. We actually respond to issues.